Table of Contents
- 1. Choose the Right Wall
- 2. Decide on Your Gallery Wall Style
- 3. Choose a Colour Direction
- 4. Create a Consistent Visual Thread
- 5. Select the Family Photos
- 6. Decide How Many Frames You Need
- 7. Plan Your Gallery Wall Layout
- 8. Test the Layout Before Hanging
- 9. Measure Everything Before Drilling
- 10. Hang Your Family Photo Gallery Wall
- 11. Review the Finished Arrangement
- FAQs About Creating a Gallery Wall With Family Photos
- Create a Gallery Wall That Tells Your Family's Story
Family photographs deserve more than a forgotten folder on your phone. A thoughtfully arranged wall lets you enjoy your favourite memories every day. Whether you live in a Dubai apartment or an Abu Dhabi villa, you can create a display that feels personal and stylish.
Learning how to create a gallery wall with family photos starts with a few simple choices. You need the right wall, suitable frames, a clear colour direction, and a layout that fits your space. With careful planning, even a small wall can become a beautiful feature in your home.
1. Choose the Right Wall
The right wall gives your gallery wall a natural place to shine. Look above your sofa, behind a dining table, along a hallway, or beside a staircase. Before choosing a location, measure the available wall space and consider how people move through the room.
In UAE homes, sunlight and air-conditioning also deserve attention. Strong sunlight can fade photographs over time, especially near large windows. Avoid areas with moisture, heat, or condensation. Choose a wall where your family photographs remain visible without competing with doors, switches, furniture, or other wall decor.
2. Decide on Your Gallery Wall Style
Your chosen style will guide your picture frames, photograph selection, and overall home decor. Before buying anything, look at your furniture, flooring, curtains, and existing decorations. A clear design direction helps your photo gallery wall design feel connected to the rest of the room.
Symmetrical
A symmetrical arrangement creates order through balanced rows, matching dimensions, and even gaps. It works well with matching frames and photographs of similar sizes. Choose this style if you prefer a neat display above a sofa, console, or dining room cabinet.
Modern
Modern gallery wall ideas often use clean lines, slim frames, and simple colours. Black, white, and metallic finishes can complement contemporary UAE interiors. Choose a few strong images and let the photographs become the main attraction.
Eclectic
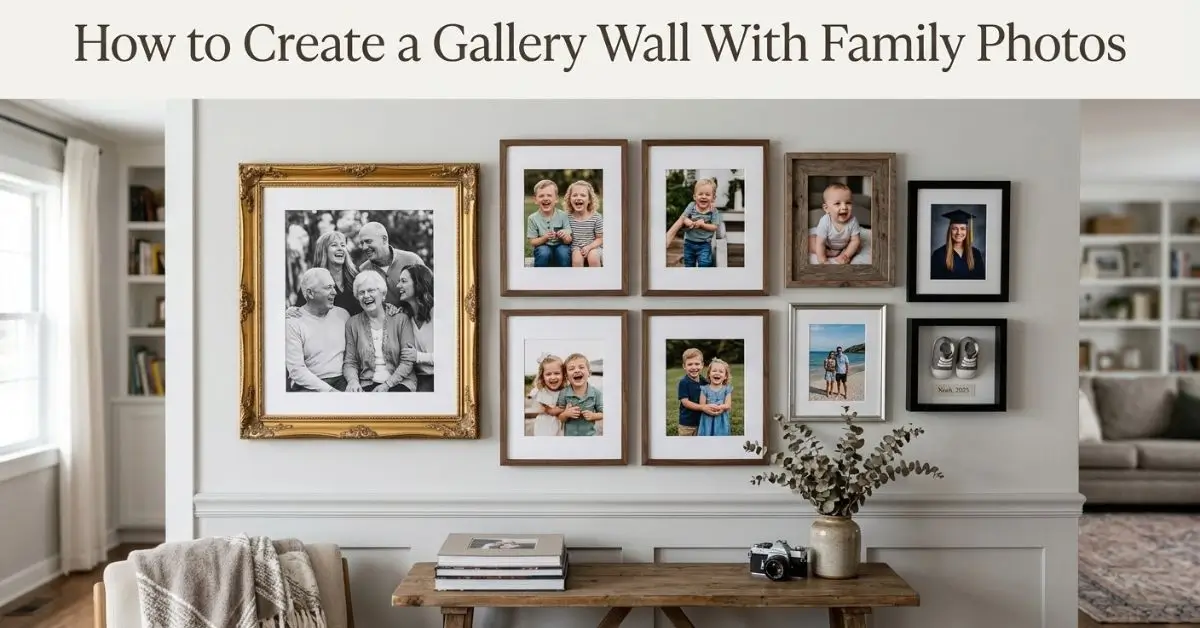
An eclectic display combines different frame sizes, finishes, and photograph styles. You might mix wedding portraits with holiday pictures and childhood memories. To keep the wall from feeling chaotic, repeat a colour or finish throughout your frame arrangement.
Minimalist
A minimalist family photo wall uses fewer photographs and generous spacing. Choose meaningful images, simple frames, and a restrained colour palette. This approach works particularly well in smaller apartments where too many decorations can make the room feel crowded.
3. Choose a Colour Direction
A clear gallery wall colour scheme helps different photographs work together. Black-and-white photos create a classic look, while colour photographs add warmth and personality. You can also combine both when the frames or mounts provide a visual link.
Consider the room’s wall colour, furniture, and natural light before selecting your frames. For example, black frames can stand out against cream walls, while natural wood adds warmth to neutral interiors. A consistent colour palette creates unity without forcing every photograph to look identical.
4. Create a Consistent Visual Thread
A gallery wall looks more polished when something connects every piece. That connection might be a shared family theme, similar frame colours, matching mounts, or photographs arranged around important life events. You don’t need identical frames to achieve a consistent style.
For example, combine black-and-white wedding photographs with recent family portraits in slim black frames. Alternatively, use different frames but repeat the same warm wood finish. These small details create visual balance and help your wall art arrangement feel intentional rather than random.
Need Custom-Sized Frames for Your Gallery Wall?
Your family photographs deserve frames that suit both the images and your interior. If you’re planning a gallery wall with different photo sizes or an unusual layout, explore ArtPlus framing services for a suitable framing solution.
ArtPlus framing services5. Select the Family Photos
Choosing photographs is one of the most personal parts of gallery wall planning. Start with images that bring back meaningful moments, then consider their quality, colours, and composition. A good photo selection tells a story rather than simply filling empty spaces.
Start With Your Favourite Images
Begin with photographs that mean the most to you. These might include a wedding, a child’s first birthday, a family holiday, or a quiet everyday moment. Place your favourite image in a prominent position and build the surrounding photo placement around it.
Mix Different Life Stages
A thoughtful display can capture years of family history. Combine childhood portraits, graduation photographs, wedding memories, and recent family gatherings. Arranging images by date creates a timeline, while mixing different stages produces a more relaxed display of family memories.
Balance Portraits and Group Photos
Individual portraits add detail, while group photographs show family connections. Use both to create variety across your photo wall display. If one large group photo dominates the arrangement, balance it with smaller portraits or candid images nearby.
Avoid Using Too Many Similar Images
Several nearly identical photographs can make your gallery feel repetitive. Choose images with different backgrounds, expressions, settings, and activities. For example, pair a formal family portrait with a holiday photograph and a candid image to give your framed family photos more personality.
6. Decide How Many Frames You Need
The right number of frames depends on the wall dimensions, your chosen layout, and the size of each photograph. A small arrangement may need only a few images, while a large living room wall can accommodate a wider collection. Start with the available area rather than buying frames at random.
The table below offers practical starting points. These are planning examples rather than fixed design rules.
| Display area | Suggested starting point | Suitable approach |
| Small hallway | 3–5 frames | Compact vertical arrangement |
| Above a console | 3–6 frames | Balanced row or small grid |
| Above a sofa | 5–9 frames | Grid or mixed-size arrangement |
| Large feature wall | 9 or more frames | Expanded grid or salon-style display |
Always consider the furniture below the wall and the size of each frame. A few large frames can make a stronger statement than many tiny ones. Your goal is a balanced personal photo display, not the highest possible number of photographs.
7. Plan Your Gallery Wall Layout
The right gallery wall layout determines how the photographs relate to one another. Before hanging anything, decide whether you want straight lines, balanced groupings, or a more relaxed arrangement. Your choice should suit the wall shape, furniture, and number of frames.
Grid Layout
A grid uses frames of similar dimensions arranged in straight rows and columns. It creates a tidy appearance and makes measuring easier. This layout suits matching photographs, coordinated mounts, and homeowners who prefer a structured photo frame arrangement.
Symmetrical Layout
A symmetrical arrangement balances the frames around a central line or main photograph. You can use different frame sizes if both sides carry similar visual weight. This approach works well when you want a formal display without making every frame identical.
Salon-Style Layout
A salon-style display combines large and small frames in a more flexible grouping. It can include family photographs, artwork, and meaningful keepsakes. Plan the outside edges first, then arrange the inner frames to create a connected gallery wall arrangement.
Staircase Layout
A staircase display follows the direction of the stairs while keeping photographs comfortable to view. Start by marking an imaginary line that follows the staircase angle. Arrange the frames around this line, then check the spacing from both the top and bottom of the stairs.
8. Test the Layout Before Hanging
Testing your design first can save time and prevent unnecessary wall damage. Trace each frame onto paper, cut out the shapes, and attach them temporarily with suitable painter’s tape. These gallery wall templates let you move the arrangement until the balance feels right.
Stand back and look at the design from the doorway, sofa, or main entrance. Check whether large frames overwhelm smaller ones and whether the gaps appear even. This simple step helps you refine the wall layout before making any holes.
9. Measure Everything Before Drilling
Accurate gallery wall measurements help create a neat result. Measure the entire display area, each frame, and the intended gaps before starting installation. Remember that frame dimensions may include the outer border, not just the visible photograph.
Measure the Wall
Measure the width and height of the wall area you plan to use. Account for furniture, switches, doorways, and nearby shelves. Mark the intended display boundaries lightly so the overall arrangement stays within the available space.
Measure Frame Spacing
Consistent spacing between frames makes a gallery wall feel organised. A gap of around 5–8 cm is a useful starting point for many arrangements, although smaller frames may need tighter spacing. Test the spacing on the wall before settling on a final measurement.
Mark Hanging Points
Check where the hanging hardware sits on each frame. Some frames use wire, while others have fixed hooks or brackets. Mark each hanging point according to the actual hardware rather than assuming the frame’s top edge indicates where the nail should go.
Check Alignment
Use a spirit level and measuring tape to check your marks before installation. Even a small error can become obvious across several rows of frames. Recheck horizontal and vertical alignment, especially when creating a grid or another structured arrangement.
10. Hang Your Family Photo Gallery Wall
Once the layout is ready, install the frames in a planned order. For a grid, start with a reference frame and use its position to guide the others. For an irregular display, begin with the main image and work outward while checking the spacing.
Choose suitable hanging hardware for the frame’s weight and your wall material. Plasterboard, masonry, and concrete may require different fixings. Before drilling holes, check for concealed electrical wires and plumbing. For heavy frames or uncertain wall conditions, seek help from a qualified installer.
11. Review the Finished Arrangement
After hanging the frames, step back and view the display from different parts of the room. Check the alignment, gaps, lighting, and relationship between the frames and nearby furniture. Adjust any photograph that looks out of place or interrupts the overall balance.
Finally, check that each frame sits securely and that the photographs remain easy to see. In bright UAE interiors, review the display at different times of day to spot glare or direct sunlight. Small adjustments can turn a good family picture wall into a more cohesive feature.
Need Custom-Sized Frames for Your Gallery Wall?
Your family photographs deserve frames that suit both the images and your interior. If you’re planning a gallery wall with different photo sizes or an unusual layout, explore ArtPlus framing services for a suitable framing solution.
ArtPlus framing servicesFAQs About Creating a Gallery Wall With Family Photos
How many photos should be in a gallery wall?
There is no fixed number. A small wall may suit three to five photographs, while a larger display can hold nine or more. Choose the number according to your wall dimensions, frame sizes, and preferred style.
How far apart should family photo frames be?
Start with approximately 5–8 cm between frames, then adjust according to their size and the wall area. Consistent spacing usually matters more than following one exact measurement throughout every room.
Should gallery wall frames match?
Matching frames create a coordinated appearance, while mixed picture frames offer more variety. Both approaches can work well. Repeat one element, such as colour, finish, or mount style, to help the arrangement feel connected.
How do you arrange family photos on a wall?
Choose your favourite photographs first, then select a layout and frame style. Test the arrangement with paper templates, measure the gaps, and mark the hanging points. Review the full design before installing the frames.
What is the easiest gallery wall layout?
A grid is often the easiest option because it uses regular rows, columns, and spacing. Matching frames make the measurements simpler. It is a practical starting point if you have not created a gallery wall before.
Can you mix family photos and art on a gallery wall?
Yes. Family photographs can sit alongside illustrations, prints, and other artwork. Use a shared colour palette or repeating frame finish to connect the different pieces without making the display look uniform.
How to organize family photos on a wall?
Arrange photographs by date, family generation, event, or colour. A chronological display tells a clear story, while a themed arrangement can feel more relaxed. Choose the method that best reflects your family’s memories.
Where not to hang family photos?
Avoid places exposed to strong direct sunlight, excessive moisture, or heat. Bathrooms, cooking areas, and spots affected by air-conditioning condensation may create problems. Choose a stable location where the photographs and frames can remain in good condition.
How can I create a gallery wall with photos?
Start by choosing a suitable wall and selecting meaningful photographs. Decide on the frame style, colour palette, and layout. Test the arrangement with templates, measure everything carefully, and use appropriate fixings to hang the frames securely.
Create a Gallery Wall That Tells Your Family’s Story
A beautiful gallery wall doesn’t need expensive décor or a complicated design. It needs meaningful photographs, thoughtful planning, and a layout that suits your home. Take your time choosing the images and test the arrangement before hanging anything.
If your photographs need different dimensions or finishes, custom framing can help bring the display together. The right frames can complement your images while fitting the space you have available.