Table of Contents
- Why Choose Ceramic Plate Printing?
- Popular Methods of Printing on Ceramic Plates
- How to Print on Ceramic Plates at Home (Sublimation Method – Step by Step)
- Step‑by‑Step Process:
- Can You Print on Ceramic Plates Without a Heat Press?
- Printable Ceramic Plate Coating: Why It Matters
- Ceramic Plate Printing Temperature & Pressure Guide
- Common Mistakes to Avoid
- Applications of Custom Ceramic Plates
- Digital Printing on Ceramic Plates for Commercial Use
- Conclusion
- FAQ
Yes, you can print on ceramic plates using sublimation, decal transfers, or UV printing. Sublimation is the most popular home method—you print a design on transfer paper, then heat‑press it onto a coated ceramic plate. The ink turns into gas and bonds permanently, creating a dishwasher‑safe, fade‑resistant print.
I’ve helped crafters turn family photos into heirloom plates and businesses brand their tableware. This guide covers every method—from affordable DIY techniques to professional commercial printing. You’ll learn exactly which tools you need, step‑by‑step instructions, and how to avoid common mistakes.
Why Choose Ceramic Plate Printing?
Custom ceramic plates are durable, elegant, and practical. Unlike paper prints or fabric transfers, ceramic designs resist fading, scratching, and washing. You can create:
- Personalized gifts (weddings, anniversaries, holidays)
- Branded tableware for restaurants, hotels, or cafés
- Decorative art pieces or commemorative plates
- Small business product lines
For larger projects like wall tiles or floor installations, professional ceramic printing in Dubai offers UV‑cured durability and custom sizes.
The versatility makes printing on ceramic plates a valuable skill for hobbyists and entrepreneurs alike.
Popular Methods of Printing on Ceramic Plates
There are four main ways to print on ceramic plates. Each has a different quality, durability, and cost.
1. Sublimation Printing (Best for Home & Photo Quality)
How to print photos on ceramic plates using sublimation: Print your design on special sublimation paper, place it on a coated ceramic plate, and apply heat and pressure. The ink turns into gas and embeds into the plate’s coating.
- Pros: Vibrant, permanent, dishwasher‑safe, and photorealistic.
- Cons: Requires coated plates, a heat press, and a sublimation printer.
- Best for: Photo plates, colorful designs, small batches.
2. Decal Transfer Printing (Simple & Low‑Cost)
How to put designs on ceramic plates using decals: Print onto transfer paper, apply to the plate, then bake or fire to set. No special printer needed.
- Pros: Affordable, accessible for beginners.
- Cons: Less durable than sublimation; may not be fully dishwasher‑safe.
- Best for: Decorative plates, hobby projects.
3. Direct UV Printing (Professional & Fast)
Digital printing on ceramic plates via UV printers: Ink is cured instantly by UV light directly onto the ceramic surface.
- Pros: Sharp, high‑resolution, no heat, works on various surfaces.
- Cons: Expensive equipment; best for flat plates.
- Best for: Commercial production, large batches.
The same UV technology lets you print photos on tiles for kitchen backsplashes and bathroom walls.
4. Hand‑Painting & Screen Printing (Traditional)
For unique, artisanal designs. Paint or screen‑print directly onto ceramic, then fire in a kiln to set.
- Pros: One‑of‑a‑kind, artistic control.
- Cons: Labor‑intensive, requires a kiln.
- Best for: Art pieces, limited editions.
Turn Your Design into a Permanent Ceramic Plate
We print on premium ceramic plates using sublimation or UV – dishwasher‑safe, fade‑resistant, and ready for gifts or business branding. Free design proof and fast UAE delivery.
Order Custom Ceramic PlatesHow to Print on Ceramic Plates at Home (Sublimation Method – Step by Step)
Sublimation is the most reliable method for printing on ceramic plates at home. Here’s the complete workflow.
Tools You’ll Need:
- Sublimation printer (Epson EcoTank converted or Sawgrass)
- Sublimation ink
- Sublimation paper
- Heat press (flat or mug press; a swing‑away press is best for plates)
- Coated ceramic plates (look for “sublimation ready”)
- Heat‑resistant tape
- Protective gloves
- Design software (Canva, Photoshop, or free alternatives)
Step‑by‑Step Process:
Step 1: Create your design
Use design software at 300 DPI, mirror the image (for sublimation, print reversed). Size it to fit the plate’s printable area.
Step 2: Print onto sublimation paper
Load sublimation paper into your printer. Print using sublimation ink. Let the ink dry for a minute.
Step 3: Clean the ceramic plate
Wipe the plate with a lint‑free cloth and isopropyl alcohol. Any dust or grease will cause print defects.
Step 4: Attach the paper to the plate
Place the printed side of the paper face down onto the plate. Secure with heat‑resistant tape – do not tape over the design area.
Step 5: Heat press settings
Set your heat press to 190–200°C (375–400°F). Pressure should be firm but not crushing. Time: 60–90 seconds for small plates, 90–120 seconds for large plates.
Step 6: Press and cool
Place the plate and paper into the heat press. Press. Remove carefully (paper is hot). Let the plate cool completely before peeling the paper.
Step 7: Peel and admire
Peel off the transfer paper. Your design is now permanently embedded. It’s instantly dishwasher‑safe.
A bride wanted custom wedding favors—50 plates with the couple’s names and date. We used sublimation on 6″ coated ceramic plates. Each plate took 90 seconds. The result was a professional, glossy finish that survived multiple dishwasher cycles. She said, “Guests kept them as keepsakes, not coasters
Can You Print on Ceramic Plates Without a Heat Press?
Can you print on ceramic plates without a heat press? Yes, using decal transfers or oven‑bake methods. Here’s how:
- Print your design on inkjet decal paper.
- Apply the decal to the plate (use water to activate).
- Let dry completely.
- Bake in a home oven at 150°C (300°F) for 30 minutes.
- Allow to cool slowly.
This method is less durable than sublimation but works for decorative plates that won’t be washed frequently.
Printable Ceramic Plate Coating: Why It Matters
Printable ceramic plate coating is a polymer layer that accepts sublimation ink. Without it, the ink will not bond. Always buy plates labeled “sublimation ready” or “coated for sublimation.” Uncoated ceramic (standard dinnerware) will not work for sublimation.
For decal transfers, coating is less critical – the decal sits on top. But for long‑lasting use, coated plates are still better.
Ceramic Plate Printing Temperature & Pressure Guide
| Printing Method | Temperature | Pressure | Time |
| Sublimation | 190–200°C (375–400°F) | Medium‑firm | 60–120 seconds |
| Decal (oven-bake) | 150°C (300°F) | N/A | 30 minutes |
| UV printing | No heat | N/A | Instant |
Consistent temperature and pressure are critical for sublimation. Too low = faded print. Too high = bleeding or yellowing.
Common Mistakes to Avoid
| Mistake | Consequence | Solution |
| Using uncoated plates | Sublimation won’t stick | Buy sublimation‑ready ceramic |
| Not mirroring the image | Text reads backwards | Flip design horizontally before printing |
| Flip the design horizontally before printing | White spots or bubbles | Clean with alcohol before pressing |
| Over‑pressing | Ink bleeding or scorched plate | Use timer; follow temperature guide |
| Peeling paper while hot | Image lifts off | Cool completely before peeling |
Applications of Custom Ceramic Plates
- Personalized gifts: Photo plates for Mother’s Day, pet portraits, family recipes.
- Business branding: Restaurant logos on dinnerware, hotel room plates, café cake plates.
- Artistic projects: Limited edition decorative plates, collectible series.
- Commemorative items: Wedding favors, anniversary plates, memorial keepsakes.
Digital Printing on Ceramic Plates for Commercial Use
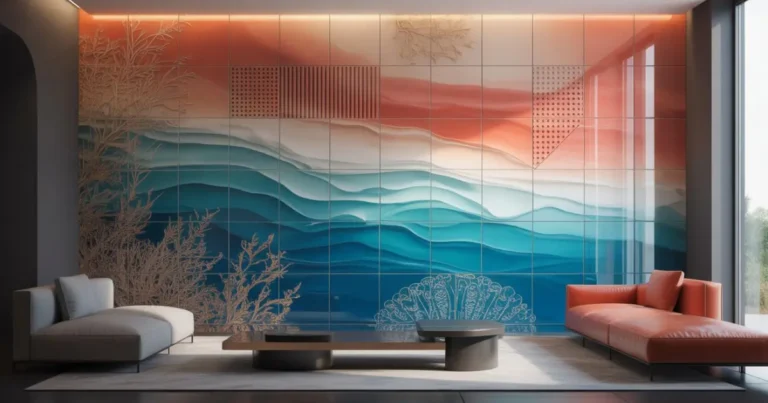
For businesses, digital printing on ceramic plates using UV or sublimation offers fast turnaround and consistent quality. You can print full‑color logos, intricate patterns, or photographic images with no minimum order. Many companies offer dropshipping or short‑run custom plates. For interior design projects, see how digitally printed ceramic tiles for interiors transform spaces with custom patterns and textures.
Conclusion
Learning how to print on ceramic plates opens up a world of creativity—from personalized gifts to commercial branding. Sublimation is the most accessible and durable method for home use, requiring a coated plate, sublimation paper, and a heat press. For budget projects, decal transfers work well. For large-scale production, UV printing is the fastest. Clean your plates, use the right temperature, and always mirror your designs. With practice, you’ll produce professional ceramic prints that last for years. Explore UV printing on ceramic tiles in UAE for high‑resolution wall art, backsplashes, and commercial flooring.
Turn Your Design into a Permanent Ceramic Plate
We print on premium ceramic plates using sublimation or UV – dishwasher‑safe, fade‑resistant, and ready for gifts or business branding. Free design proof and fast UAE delivery.
Order Custom Ceramic PlatesFAQ
Can you print on ceramic plates?
Yes, using sublimation, decal transfer, UV printing, or hand‑painting. Sublimation gives the most durable, dishwasher‑safe results.
How to put an image on a ceramic plate?
The most reliable home method is sublimation: print your image on sublimation paper and heat‑press it onto a coated ceramic plate. The image becomes permanent.
How do you print on ceramic?
There are several methods: sublimation (best for photos), decal transfers (budget), UV printing (commercial), and screen printing (artisanal).
How do you put designs on ceramic plates?
Designs can be transferred using heat (sublimation), decals + oven baking, or direct UV printing. Choose based on your budget and durability needs.
What temperature do you sublimate on ceramic plates?
190–200°C (375–400°F) for 60–120 seconds, depending on plate size and heat press.
Can I use a regular inkjet printer for ceramic printing?
No – regular ink will wash off. For sublimation, you need sublimation ink and paper. For decals, you can use regular inkjet ink, but the result will not be waterproof.