Table of Contents
- Why Wall Preparation Matters Before Wallpaper Installation
- How to Prepare Walls for Wallpaper (Step by Step)
- What Is the Correct Way to Wallpaper? (Professional Sequence)
- How to Install Wallpaper on Painted Wall (Special Considerations)
- How to Install Wallpaper Peel and Stick (Easier for Beginners)
- Installing Wallpaper Around Corners and Edges
- How to Hang Wallpaper on One Wall (Feature Wall)
- Common Wallpaper Installation Mistakes (And How to Avoid Them)
- How Long Should Primer Dry Before Wallpaper Installation?
- Why Is Wallpaper Bubbling After Installation?
- Conclusion
- FAQ
The steps for installing wallpaper are the following: prepare the wall (clean, repair, and prime); measure and cut strips; apply adhesive correctly; hang the first strip from top to bottom; smooth out bubbles; align patterns; and trim edges. Start with the least visible wall to practice.
I’ve fixed too many DIY wallpaper jobs that went wrong. The common thread? Skipping wall preparation. Wallpaper is unforgiving—every bump, crack, or dust speck shows through. This guide gives you a professional‑tested, step‑by‑step process. Follow it, and your wallpaper will look like it was hung by a pro.
Why Wall Preparation Matters Before Wallpaper Installation
Wall preparation for wallpaper is the single most important step. Wallpaper highlights imperfections more than paint does. Small cracks, uneven texture, peeling paint, or trapped dust become visible once the wallpaper is up.
Good preparation gives you:
- Smoother adhesion
- Cleaner, invisible seams
- Longer durability
- No bubbling or lifting
Even expensive, high‑quality wallpaper looks cheap if the wall underneath is a mess.
How to Prepare Walls for Wallpaper (Step by Step)
How to prepare walls for wallpaper in four steps:
Step 1: Inspect under proper lighting
Use a work light shining sideways across the wall. Look for hairline cracks, peeling paint, dents, holes, uneven texture, or moisture stains.
Step 2: Repair damage
Fill cracks and holes with spackling compound. Sand smooth once dry. Feather the edges so the repair blends with the wall.
Step 3: Clean thoroughly
Wipe walls with a damp cloth to remove dust and grease. Pay special attention to kitchen walls—invisible grease kills the adhesive bond.
Step 4: Apply primer
Use a wallpaper‑specific primer (not a general paint primer). It creates a slightly textured surface for better adhesion and makes future removal easier.
“I’ve seen beginners skip primer because they were in a hurry. Three months later, the seams were peeling. Primer costs very little compared to redoing an entire room.”
What Is the Correct Way to Wallpaper? (Professional Sequence)
What is the correct way to wallpaper? Start with the least visible wall – it gives you room to practice alignment before reaching focal areas. Work from top to bottom, one strip at a time. Always butt seams tightly (no overlap). Smooth from the center outward.
Stuck on a tricky wall? Let us handle the installation.
We prepare, prime, and hang your wallpaper with precision – no bubbles, no mismatched seams. Serving homes and offices across the UAE.
Book Professional InstallationStep‑by‑Step: How to Install Wallpaper Properly
Step 1: Measure your wall
Wall height and total width. Subtract windows and doors. Add 5 cm (2 inches) extra per strip for trimming.
Step 2: Cut strips
On a clean, flat surface, cut strips to length. For repeating patterns, match the design before cutting. Wallpaper measuring and cutting tip: Label each strip with a number if the pattern sequence is complex.
Step 3: Apply adhesive correctly
Follow the manufacturer’s instructions—some wallpapers are paste‑the‑wall, others are paste‑the‑paper. Apply wallpaper adhesive evenly. Too little causes peeling; too much creates bubbles or seepage.
Step 4: Let the strip relax (pro tip)
After applying the adhesive, let the strip sit for 2–3 minutes. This allows the paper to expand slightly, reducing the risk of seam shrinkage later.
Step 5: Hang the first strip
Start at a plumb line (vertical line drawn with a level). Position the top, then work downward. Smooth from center to edges using a wallpaper brush or smoothing tool.
Step 6: Align pattern and seam
But the next strip against the first—no overlap. Match the pattern carefully. Even 1 mm misalignment becomes noticeable across a large wall.
Step 7: Trim excess at the ceiling and baseboard
Use a sharp utility knife and a wide scraper as a guide. Change blades frequently – dull blades tear the paper.
Step 8: Roll the seams.
Use a seam roller gently to ensure the edges are flat. Don’t press too hard – you could squeeze out adhesive and create shiny marks.
How to Install Wallpaper on Painted Wall (Special Considerations)
How to install wallpaper on a painted wall is common. But not all painted walls are suitable. Gloss or semi‑gloss paint is too smooth—wallpaper won’t stick well. You need to:
- Lightly sand the paint to create “tooth.”
- Clean off all sanding dust
- Apply a wallpaper primer rated for painted surfaces
Will wallpaper stick to melamine? No. Melamine is too smooth and non‑porous. Wallpaper adhesive will not bond reliably. You would need to rough‑sand extensively and use a specialty primer—still not recommended.
How to Install Wallpaper Peel and Stick (Easier for Beginners)
Installing peel-and-stick wallpaper is simpler than traditional paste wallpaper. Peel-and-stick (self‑adhesive) wallpaper is ideal for:
- Renters
- Temporary accents
- Small walls
- Beginners
Installation steps:
- Clean and dry the wall thoroughly.
- Peel back 5 cm of backing.
- Stick the top edge, then slowly peel and smooth downward.
- Use a smoothing tool to remove air bubbles.
- Trim excess with a sharp knife.
Can you use Zinsser on wallpaper? Zinsser makes primers and sealers. Some are used to prime walls before wallpaper (e.g., Zinsser Gardz). But don’t apply Zinsser products onto installed wallpaper unless the product specifically says it’s for sealing wallpaper.
Installing Wallpaper Around Corners and Edges
Corners are the most frustrating part. Inside corners are rarely perfectly straight. Forcing a full strip around a corner creates wrinkles.
Professional method:
- Cut the strip so it extends 2–3 cm around the corner.
- Smooth it around carefully, making relief cuts if needed.
- On the adjacent wall, start a new strip overlapping that edge by 1–2 cm.
Around windows and doors, make small diagonal relief cuts so the paper lies flat without tearing.
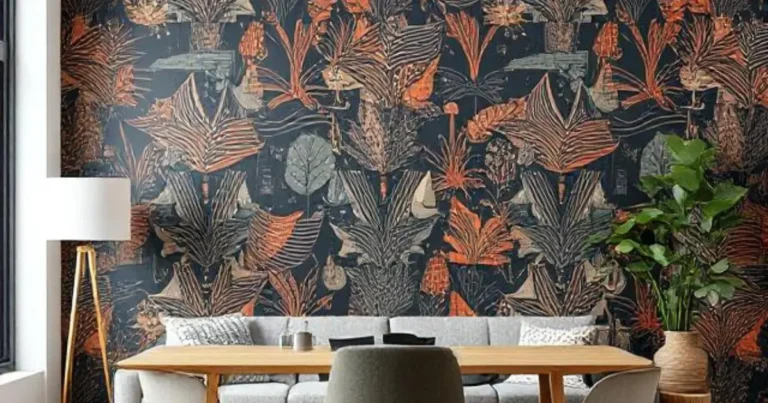
How to Hang Wallpaper on One Wall (Feature Wall)
Hanging wallpaper on one wall follows the same steps as a full room, but with less pressure. A single feature wall is perfect for beginners.
- Choose the wall that draws the eye (behind a sofa, bed, or console).
- Measure carefully – a misaligned pattern on a single wall is very noticeable.
- You can use peel-and-stick for easy installation and removal.
Common Wallpaper Installation Mistakes (And How to Avoid Them)
| Mistake | Consequence | Fix |
| Skipping wall primer | Seams peel, wallpaper bubbles | Always prime—non‑negotiable |
| Installing over dusty walls | Poor adhesion, visible bumps | Clean walls twice, then again |
| Rushing seam alignment | Patterns don’t match; it looks cheap | Use a level guide; take your time |
| Over‑applying adhesive | Bubbles, seepage at seams | Apply thin, even coats |
| Trimming before smoothing | Crooked edges, gaps | Smooth completely, then trim |
How Long Should Primer Dry Before Wallpaper Installation?
How long should the primer dry before wallpaper installation? Most wallpaper primers need 2–4 hours to dry, but always check the manufacturer’s label. High humidity or cool temperatures can extend drying time. Don’t rush—installing on tacky primer causes poor adhesion and bubbling.
Why Is Wallpaper Bubbling After Installation?
Why is wallpaper bubbling after installation? Three main reasons:
- Trapped air: not smoothed enough from the center outward.
- Uneven adhesive application: dry spots or too much glue.
- Poor wall preparation: dust, grease, or unprimed surfaces.
Fix small bubbles by gently lifting the edge and re‑smoothing. Large bubbles may require redoing the strip.
Conclusion
A successful wallpaper installation comes down to three things: preparation, patience, and precision. Clean and prime your walls. Measure twice, cut once. Let the adhesive relax. Butt seams tightly. And always start on a less visible wall to practice. Follow this wallpaper installation guide, and you’ll transform your room without the frustration of bubbles, peeling, or mismatched patterns.
Stuck on a tricky wall? Let us handle the installation.
We prepare, prime, and hang your wallpaper with precision – no bubbles, no mismatched seams. Serving homes and offices across the UAE.
Book Professional InstallationFAQ
What are the steps for installing wallpaper?
Clean and prime the wall, measure and cut strips, apply adhesive, hang the first strip from top to bottom, smooth out bubbles, align patterns, trim edges, and roll seams.
Can you use Zinsser on wallpaper?
Zinsser makes primers for walls before wallpaper. Do not apply Zinsser onto installed wallpaper unless the product explicitly says it’s for sealing wallpaper.
Will wallpaper stick to melamine?
No. Melamine is too smooth and non‑porous for reliable adhesion. Sanding and specialty primers are not recommended; choose a different surface.
What is the correct way to wallpaper?
Start at a plumb line, apply adhesive evenly, let the strip relax, hang it from top to bottom, smooth it from the center outward, butt seams tightly, and trim with a sharp blade.
How to install wallpaper on a painted wall?
Lightly sand gloss paint, clean dust, apply wallpaper primer, and then hang as usual. Flat or matte paint may not need sanding but still requires primer.
How to install wallpaper peel and stick?
Clean the wall, peel the backing gradually, stick from top to bottom, smooth out air bubbles, and trim edges. No adhesive or drying time needed.
